Complete Guide: How to Reinstall Windows via USB with Rufus
This detailed guide will walk you through the entire process of reinstalling Windows on your computer, from downloading the official ISO image to creating a bootable USB drive with the Rufus tool and, finally, installing the operating system.
Requirements
Before you begin, make sure you have the following items:
-
A computer with internet access to download the necessary files.
-
A USB flash drive with at least 8 GB of storage capacity.
-
The computer where Windows will be installed.
Part 1: Downloading the Windows ISO from os.click
The first step is to obtain the Windows ISO image. We will use the os.click website, which offers a simplified process for downloading operating system ISOs.
-
Access the website: Open your browser and go to https://os.click/en.

-
Start the process: Click the "GET MY ISO" button to begin selecting your ISO.
-
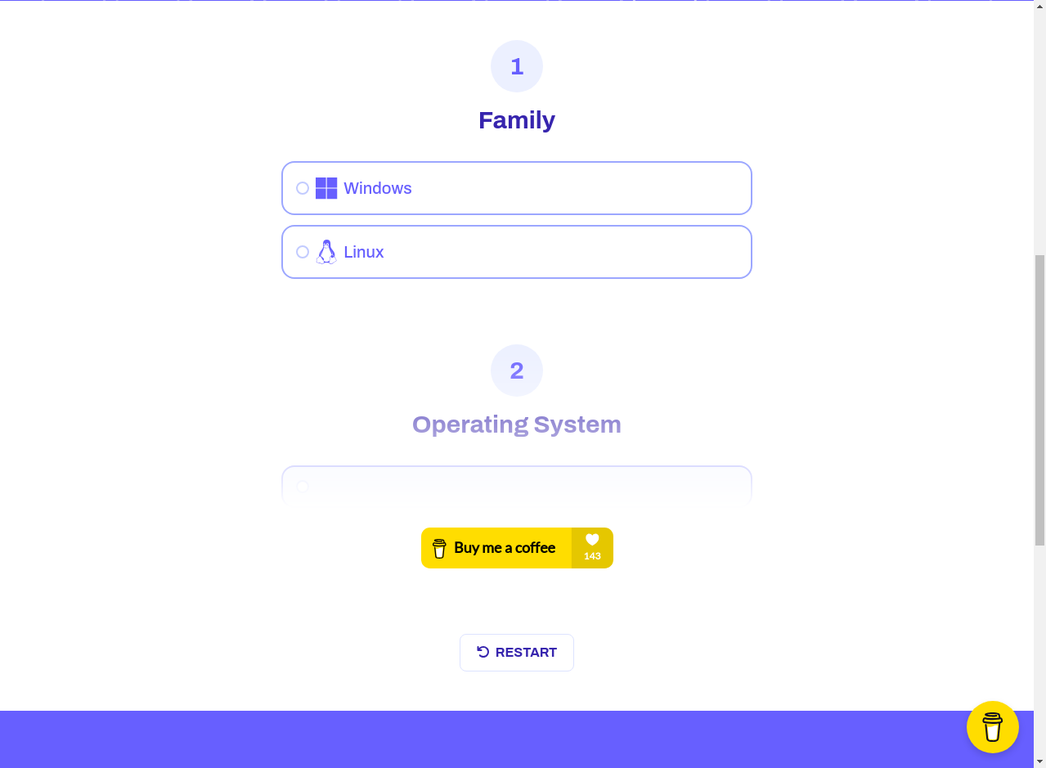
Select the OS family: Choose "Windows" as the operating system family.
-
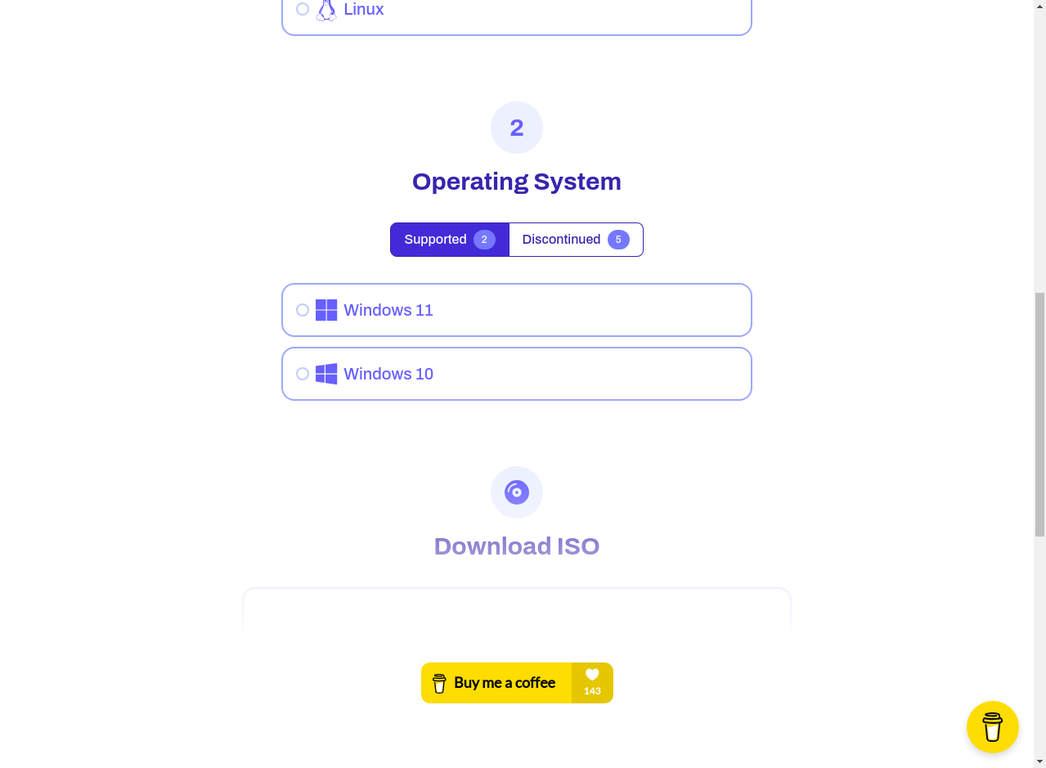
Choose the Windows version: Select the version of Windows you want to install, such as "Windows 11".
-
Continue the selection: Proceed with the selections for Version, Build, Edition, and Language according to your needs. The site will guide you through each step.
-
Download: At the end of the process, a download link for the ISO image will be generated. Download the file and save it to an easily accessible location on your computer.
Part 2: Creating the Bootable USB Drive with Rufus
With the ISO image in hand, the next step is to create a bootable USB drive using Rufus, a popular and reliable tool for this purpose.
-
Download Rufus: Go to the official Rufus website at https://rufus.ie/en/ and download the latest version.
-
Run Rufus: Rufus is a portable application, so you don't need to install it. Just run the downloaded file.
-
Configure Rufus: Follow the steps below to configure Rufus correctly:
-
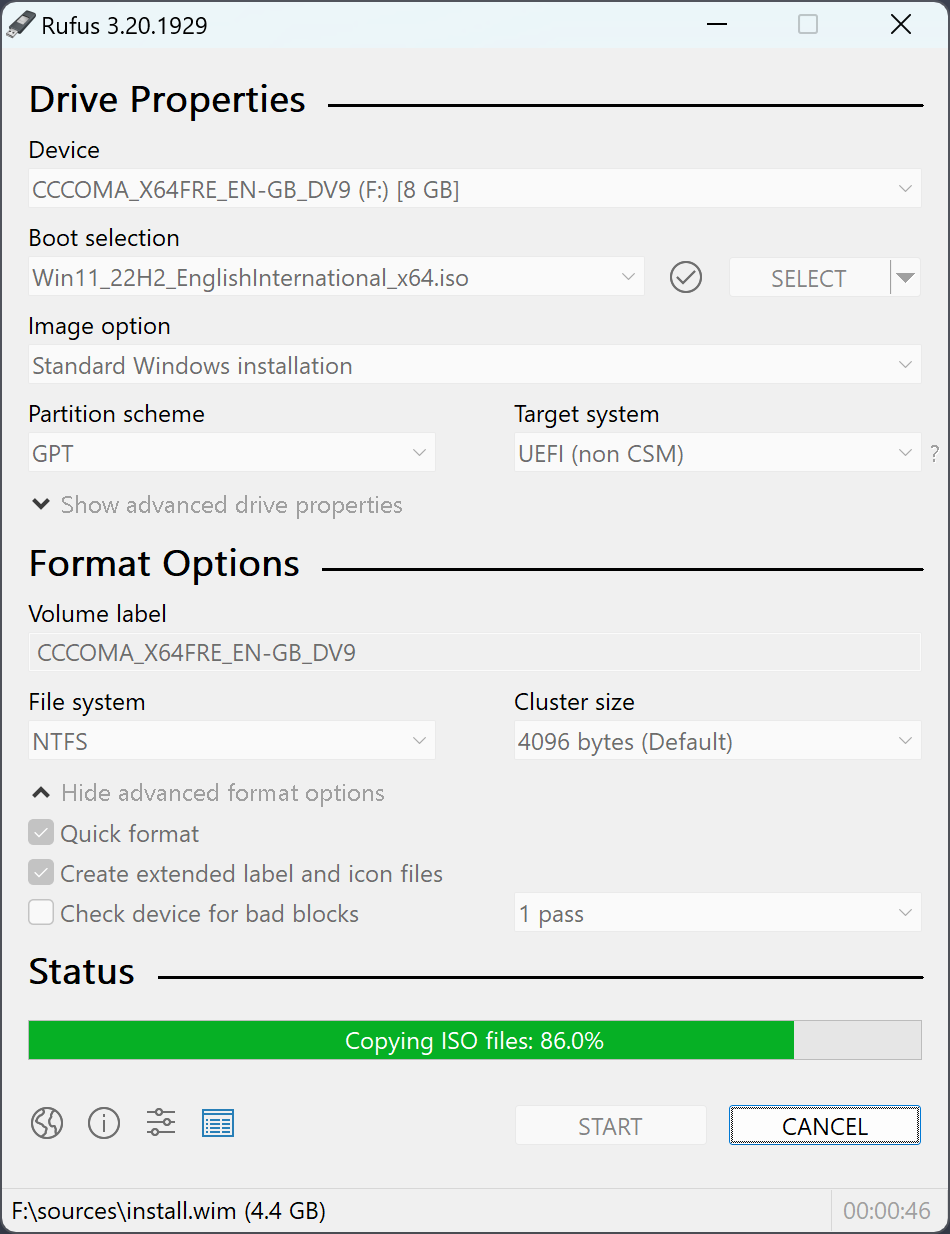
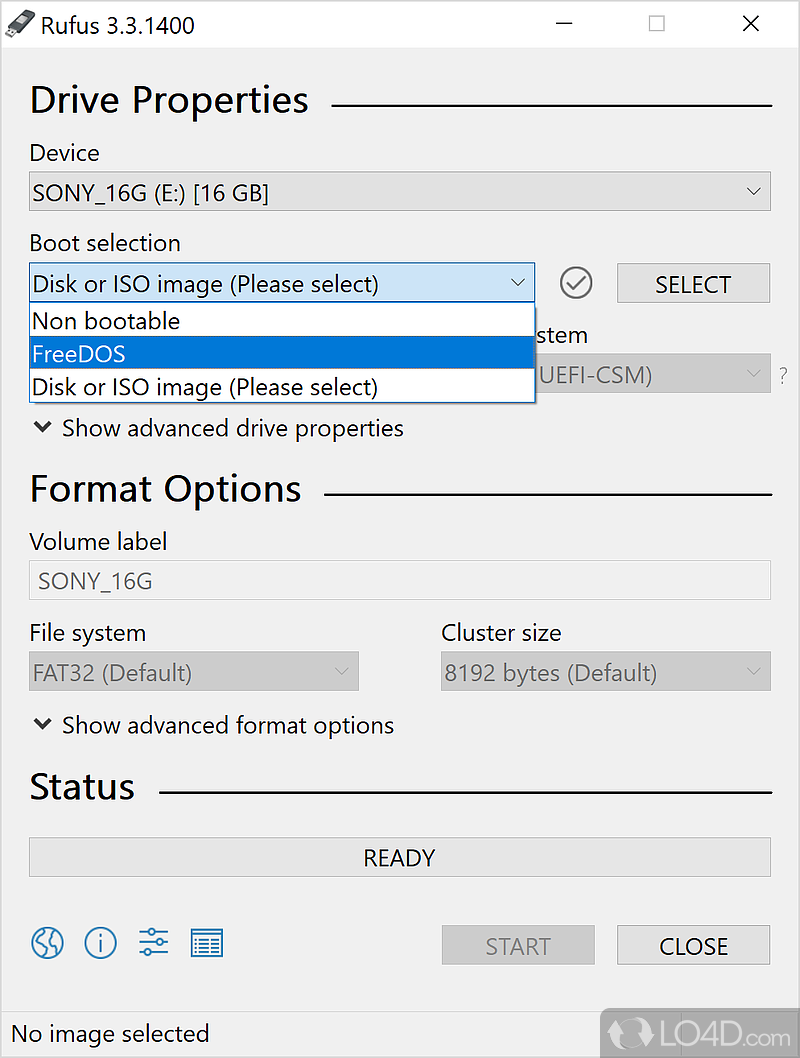
Device: Insert your USB drive and select it from the device list.
-
Boot selection: Click "SELECT" and choose the Windows ISO file you downloaded.
-
Partition scheme: For modern computers, select GPT. For older computers, MBR may be the correct option.
-
Target system: Generally, UEFI (non CSM) is the default option for GPT.
-
File system: Keep NTFS.
-
Cluster size: Keep the default.
-
-
Start the process: Click "START" to begin creating the bootable USB drive. Rufus will display a warning that all data on the USB drive will be erased. Confirm to continue.
-
Wait for completion: The process may take a few minutes. Wait until the Rufus status bar turns completely green and displays the message "READY".
Part 3: Installing Windows
Now that you have a bootable USB drive, it's time to install Windows on the target computer.
-
Connect the USB drive: Connect the bootable USB drive to a USB port on the computer where Windows will be installed.
-
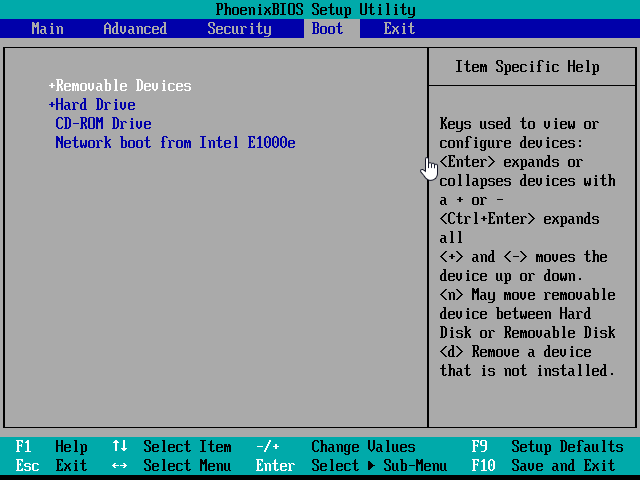
Access the BIOS/UEFI: Restart the computer and press the appropriate key to enter the BIOS/UEFI setup (usually Del, F2, F10, or Esc). Consult your motherboard's manual for the correct key.
-
Change the boot order: In the BIOS/UEFI, navigate to the "Boot" section and change the boot order so that the USB drive is the first device.
-
Save and exit: Save the changes and exit the BIOS/UEFI. The computer will restart and boot from the USB drive.
-
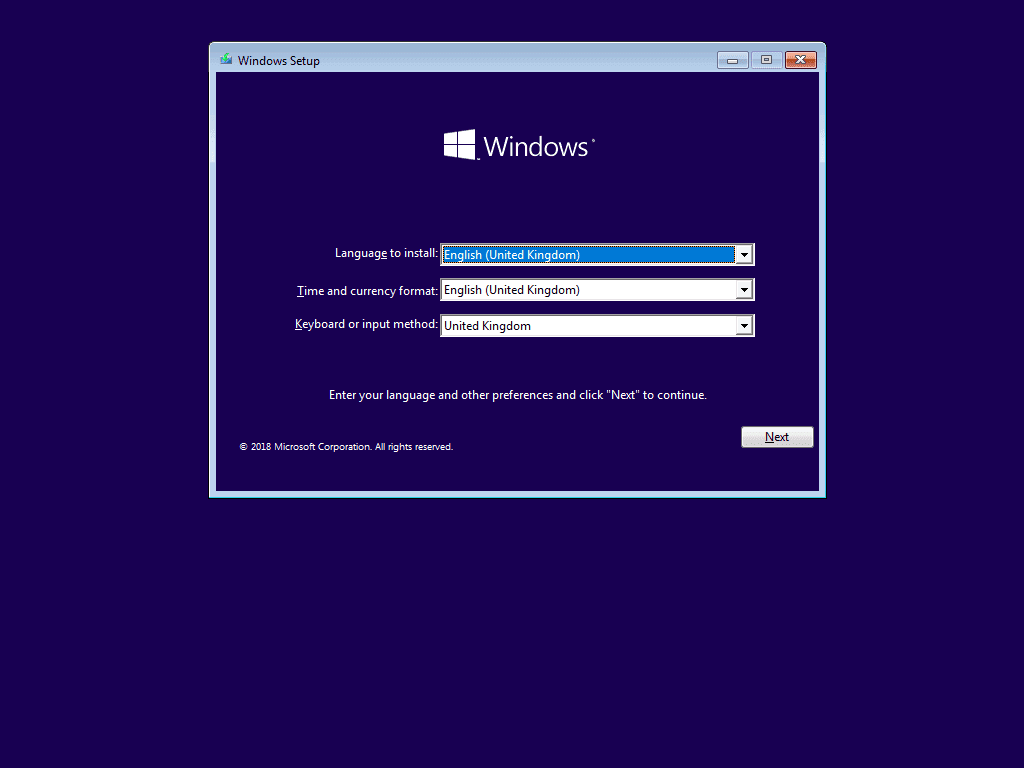
Start the Windows installation: The Windows installation screen will appear. Follow the on-screen instructions to select the language, Windows edition, and installation location.
-
Complete the installation: The installation process will copy the Windows files to your hard drive and restart the computer several times. Follow the instructions to set up your user account and other preferences.
Conclusion
Congratulations! You have successfully reinstalled Windows using a bootable USB drive created with Rufus. This process is useful for performing a clean installation of the operating system, troubleshooting problems, or upgrading to a new version of Windows.